Macrium Reflect Free is a powerful, free disk imaging and backup program that lets you create system images, incremental backups, and even clone your hard drive. It’s a lifesaver for anyone who wants to protect their data without breaking the bank, offering features usually found only in paid software. This guide will walk you through its key functionalities, from creating your first backup to restoring your system to new hardware, covering everything you need to know to confidently use this essential tool.
We’ll explore the process of creating full and incremental backups, comparing their sizes and efficiency. We’ll also delve into the various restore options, the importance of image verification, and the creation of bootable rescue media. We’ll even touch on some basic partition management and file/folder backups, showcasing the versatility of Macrium Reflect Free. Finally, we’ll compare its capabilities to other free alternatives.
Macrium Reflect Free

Macrium Reflect Free is a powerful, free tool for backing up your entire system or individual disks. It’s user-friendly enough for beginners but offers advanced features for more experienced users. This guide focuses on creating system images, a crucial aspect of data protection. We’ll cover the steps involved, the differences between system and disk images, and the impact of compression levels on image size.
System Image Creation
Creating a system image with Macrium Reflect Free is straightforward. A system image is a complete backup of your operating system, applications, and data residing on your system partition(s). This allows for a full restoration to the exact previous state, unlike a simple file backup.
- Launch Macrium Reflect Free and Select “Create an Image of the partition(s) containing Windows”: Upon opening Macrium Reflect, you’ll be greeted with the main interface. Select this option from the main menu. A screen will appear showing your available partitions and drives.
- Choose the Partition(s) to Image: Carefully select the partition(s) containing your Windows installation. Typically, this is the C: drive. Incorrect selection can lead to problems during restoration. A descriptive image here would show a screen with a list of partitions (e.g., C:, D:, etc.) with checkboxes next to them, highlighting the C: drive as the selected one.
- Select the Destination for the Image: Choose where you want to save the image file. External hard drives are ideal due to their large capacity and physical separation from your system. You can also use network locations or other internal drives, but external drives offer better protection against data loss. The image would show a window allowing the user to browse for a save location, with options to select different drives or folders.
- Configure Image Settings (Optional): Macrium Reflect offers various settings, including compression levels (Normal, High, Maximum) and the ability to split the image into smaller files (useful for smaller storage media). The image would show the settings menu, highlighting options like compression level, file splitting, and verification options.
- Review and Start the Imaging Process: Before initiating the backup, review your selections to ensure accuracy. Once confirmed, click the “Finish” or equivalent button to begin creating the image. A progress bar will indicate the backup’s status. The image would show a confirmation dialog box summarizing the backup settings, along with a start button.
System Image vs. Disk Image
A system image, as discussed above, backs up only the partitions necessary for your operating system to function. A disk image, on the other hand, creates a complete backup of the entire physical disk, including all partitions, regardless of whether they are bootable or contain operating system files. Therefore, a disk image will generally be significantly larger than a system image.
Choose a disk image if you need to back up data on all partitions of a hard drive, not just the OS.
Compression Level Impact on Image Size
The compression level you select significantly affects the size of your system image. Higher compression levels result in smaller image files but require more processing time. Below is a sample comparison (note that actual sizes will vary based on your system configuration and data):
| Compression Level | Approximate Size (Example) | Backup Time (Example) | Notes |
|---|---|---|---|
| Normal | 150 GB | 30 minutes | Good balance between size and speed. |
| High | 120 GB | 1 hour | Smaller image size, but longer backup time. |
| Maximum | 100 GB | 2 hours | Smallest image size, but significantly longer backup time. |
Macrium Reflect Free
Macrium Reflect Free is a powerful and user-friendly backup solution, especially appreciated for its incremental backup capabilities. Understanding how these incremental backups function and how to manage them is key to maximizing its efficiency and minimizing storage space usage. This section will delve into the mechanics of incremental backups within Macrium Reflect Free, demonstrating their advantages and how to effectively schedule and manage them.Incremental backups within Macrium Reflect Free work by only saving the changes made since the last backup, whether that’s a full backup or a previous incremental backup.
This contrasts with full backups, which copy all selected data every time. The significant advantage of this approach is a considerable reduction in backup time and storage space consumption, especially over longer periods. This efficiency is particularly beneficial for systems with large amounts of data or limited storage capacity.
Incremental Backup Functionality and Advantages
Incremental backups dramatically improve backup efficiency. Instead of repeatedly copying the entire dataset, only the modifications are saved. This translates to faster backup speeds and reduced storage requirements. Consider a scenario where you have a 500GB hard drive with 200GB of data. A full backup would always require 200GB of space.
However, if only 10GB of data changes daily, an incremental backup would only need 10GB of storage space each day. This cumulative approach minimizes resource consumption and speeds up the backup process. The recovery process, while potentially taking slightly longer than restoring from a full backup, remains reasonably fast as it only needs to chain together the relevant incremental backups.
Scheduling Incremental Backups and Retention Policies
Macrium Reflect Free allows for flexible scheduling of incremental backups. You can set backups to run daily, weekly, or monthly, at a time convenient for you. Crucially, it also allows for defining retention policies. This dictates how many incremental backups are kept before older ones are automatically deleted. For instance, you might choose to retain the last seven daily incremental backups, ensuring you have a week’s worth of recovery points while preventing your backup storage from becoming unwieldy.
The scheduling options within the software are straightforward and clearly presented, making the process simple even for novice users.
Storage Space Comparison: Full vs. Incremental Backups
The difference in storage space usage between full and incremental backups becomes increasingly pronounced over time.Let’s illustrate this with a simple chart description. Imagine a 100GB dataset.| Backup Type | Day 1 (GB) | Day 2 (GB) | Day 3 (GB) | Day 4 (GB) | Day 5 (GB) | Total Storage Used (GB) ||—————–|————|————|————|————|————|————————-|| Full Backup | 100 | 100 | 100 | 100 | 100 | 500 || Incremental Backup (assuming 10GB change daily) | 100 | 110 | 120 | 130 | 140 | 500 |While the total storage used at the end of 5 days might appear similar, the key difference lies in the growth rate.
Full backups linearly increase storage space consumption, whereas incremental backups exhibit a much slower, more manageable growth, especially when changes are relatively small. After a month, or a year, the savings from incremental backups become incredibly significant.
Macrium Reflect Free
Macrium Reflect Free offers a surprisingly robust set of tools for backing up and restoring your system, even exceeding the capabilities of some paid alternatives. Understanding its restore options is crucial for effectively recovering your data and system in various scenarios. This section details the different restore options available and provides a workflow for more complex restoration tasks.
Restore Options in Macrium Reflect Free
Macrium Reflect Free provides several restore options, allowing for flexibility depending on your needs. The core options revolve around the level of granularity you need in your recovery. A full restore is the most comprehensive, while selective restores offer more targeted recovery.
- Full System Restore: This option restores a complete image backup, effectively returning your system to the exact state it was in at the time of the backup. This is ideal for recovering from major system failures or complete data loss. It’s a “one-click” solution for a complete system overhaul.
- Selective Restore: This allows you to restore individual files and folders from a system image, without affecting the rest of your system. This is useful for recovering specific data, like a lost document, without a full system rebuild. Think of it as targeted recovery, ideal for recovering individual files or folders. It’s much faster than a full restore.
- Bare Metal Restore: This is a full system restore performed on a different hardware configuration. It’s more complex than a standard full restore and requires careful planning, as detailed in the next section. This is the go-to option for moving your system to a new computer.
Restoring a System Image to Different Hardware
Restoring a system image to different hardware, often called a “bare metal restore,” requires a few extra steps. The key is to ensure driver compatibility between your old and new hardware. Here’s a workflow:
- Create a bootable rescue media: Macrium Reflect allows you to create a bootable USB drive or CD/DVD. This is essential for booting your new hardware and initiating the restore process.
- Prepare the destination hardware: Ensure your new hardware is clean, with no existing operating system installed. You might need to configure the BIOS settings, such as disabling Secure Boot or enabling Legacy Boot mode (depending on the specific hardware and your system image).
- Boot from rescue media: Boot your new hardware using the bootable rescue media created in step 1. This will launch Macrium Reflect.
- Select the system image: Choose the system image you wish to restore from your backup location.
- Initiate the restore: Macrium Reflect will guide you through the restore process. It might prompt you to select the target drive and partition. Carefully select the correct drive to avoid overwriting valuable data.
- Post-restore driver installation: After the restore, you might need to install drivers for your new hardware. Macrium Reflect may attempt to do this automatically, but manual driver installation might be necessary for optimal performance.
Testing a System Restore
Before relying on a system restore in a production environment, always test it thoroughly. This prevents unexpected issues and data loss.
The best practice is to create a test environment. This could be a virtual machine (VM) or a separate, less critical physical machine. Restore your system image to this test environment, and verify that everything works correctly—applications, drivers, network connectivity, and data integrity. Only after successful testing in this environment should you proceed with restoring to your primary machine.
Macrium Reflect Free
Cloning your hard drive can seem daunting, but with Macrium Reflect Free, it’s surprisingly straightforward. This powerful tool allows you to create an exact copy of your entire hard drive, preserving your operating system, applications, and data. This is invaluable for backups, upgrading hardware, or troubleshooting system issues. This guide will walk you through the process, highlighting important considerations and potential pitfalls.
Prerequisites and Considerations Before Cloning
Before you begin cloning your hard drive, there are several crucial steps to ensure a smooth and successful process. First, you need a target drive with sufficient storage capacity. The target drive must be at least as large as the source drive, or the clone will fail. Ideally, the target drive should be completely empty; cloning to a partially filled drive can lead to complications.
Secondly, ensure your source drive is fully backed up. While cloning is generally safe, unexpected issues can occur, and having a backup provides a safety net. Finally, make sure you have a stable power supply and enough free space on your system drive to handle the temporary files Macrium Reflect creates during the cloning process. Ignoring these prerequisites could result in data loss or a failed clone.
The Cloning Process Using Macrium Reflect Free
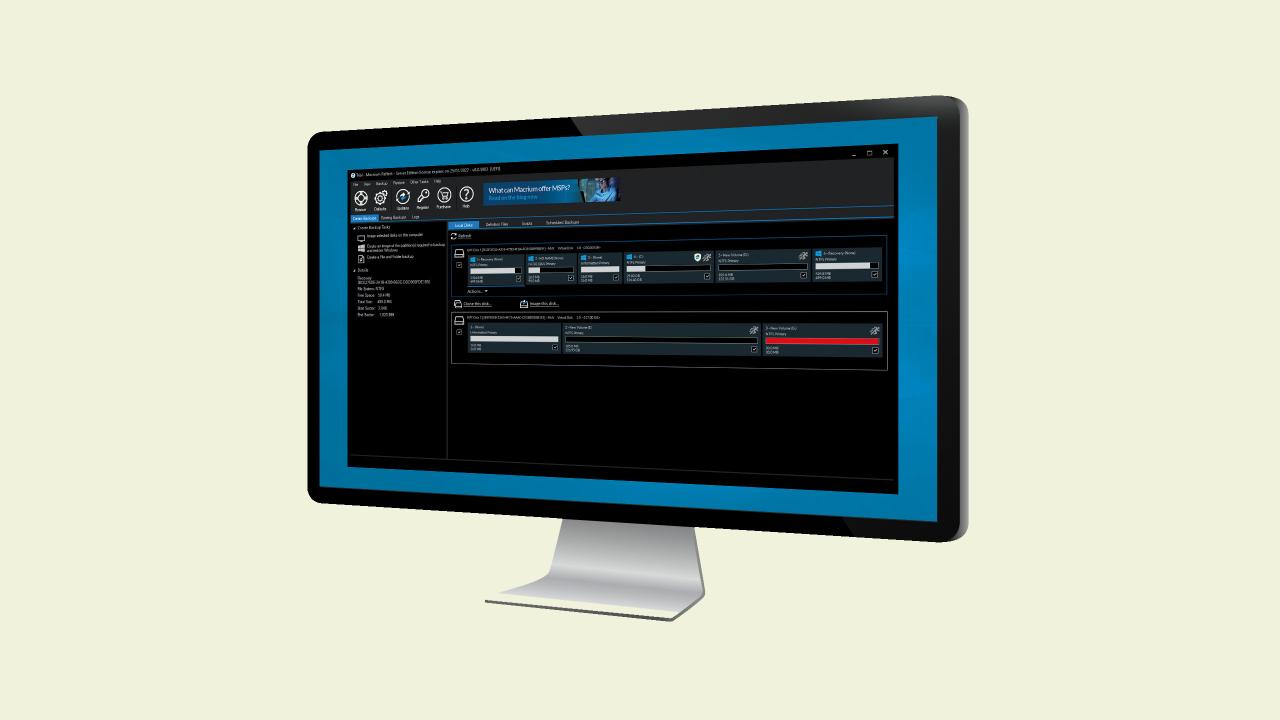
The cloning process itself is relatively intuitive. After launching Macrium Reflect Free, select “Clone this disk” from the main menu. You’ll then be prompted to select the source and destination drives. Carefully verify that you have selected the correct drives to avoid accidentally overwriting valuable data. Macrium Reflect provides clear visual cues, usually depicting the drives with their respective sizes and labels, to help you avoid errors.
Once the source and destination drives are chosen, Macrium Reflect will initiate the cloning process. This can take a considerable amount of time, depending on the size of the drive and the speed of your hardware. During this time, avoid interrupting the process, as this could lead to data corruption or a failed clone. Upon completion, you’ll be able to verify the clone by booting from the cloned drive.
If you are cloning to a new drive and replacing your old one, ensure to correctly adjust the boot order in your BIOS settings.
Potential Issues and Their Solutions
Several issues might arise during the cloning process. One common problem is insufficient disk space on the target drive. This is easily avoided by verifying the target drive’s capacity before initiating the clone. Another potential issue is a faulty source drive. If the source drive has bad sectors or other physical problems, the cloning process may fail or result in a corrupted clone.
Running a diagnostic tool on the source drive before cloning is highly recommended. Finally, hardware issues such as a failing hard drive, insufficient RAM, or a weak power supply can also cause problems. Addressing these hardware issues before attempting to clone will prevent many potential headaches. In the event of a failed clone, review the Macrium Reflect logs for specific error messages, which can provide valuable clues for troubleshooting.
If you encounter persistent problems, seeking help from online forums or the Macrium Reflect support community is advisable.
Macrium Reflect Free
So, you’ve created a backup image with Macrium Reflect Free – congrats! But the job’s not quite done yet. Think of your backup image like a really important term paper: you wouldn’t submit it without proofreading, right? Verifying your image ensures it’s actually recoverable and hasn’t been corrupted during the backup process. This is crucial; a corrupted image means data loss, which defeats the whole purpose of backing up in the first place.Verifying your image is a quick process that gives you peace of mind, knowing your data is safe and sound.
It’s a simple check that could save you hours, days, or even weeks of heartache later. It’s a small investment of time for a huge return in data security.
Image Verification Process
Macrium Reflect Free provides a straightforward way to verify your image integrity. After creating your backup image, locate the image file in the directory you specified during the backup process. In Macrium Reflect Free, select the image from the list of backups. Then, select the “Verify” option from the context menu (usually a right-click). The software will then begin checking the image’s integrity, comparing checksums and verifying file structures to ensure everything is consistent and undamaged.
This process takes a while, depending on the size of the image, so be patient. You’ll receive a notification once the verification is complete, indicating whether the image is valid or not. A successful verification means your image is good to go; you can rest easy knowing your data is safe.
Troubleshooting Verification Failures
If the image verification fails, don’t panic. There are several things you can try. First, check the health of your hard drive. A failing hard drive could be the culprit, making it impossible to reliably read or write data, including the backup image. Run a hard drive diagnostic tool (like the one built into Windows) to check for errors.
If you find problems, you might need to replace your hard drive.Second, try verifying the image again. Sometimes, temporary glitches or system issues can cause a false failure. If the problem persists, consider trying a different USB port or drive if you’re using an external drive for the backup. Different USB controllers can have varying levels of reliability.Third, try creating a new image.
If the verification consistently fails for the same image, it’s possible the original backup process was interrupted or corrupted. Creating a fresh backup will ensure a clean, verifiable image. Remember to check your system’s resources (disk space, memory) to ensure sufficient resources are available during the backup process. Insufficient resources can lead to incomplete or corrupted backups.Finally, if none of these steps work, consider contacting Macrium Reflect support.
They can provide more specific troubleshooting guidance based on the error message or details about your system. They’re usually quite helpful and responsive.
Macrium Reflect Free is a solid choice for basic system imaging, especially if you’re just starting out. Learning more about system administration, though, could really boost your skills; check out this program on alx software engineering to level up your game. Once you’re comfortable with the fundamentals, you’ll appreciate Macrium Reflect Free even more, as it’s a great tool for practicing those skills.
Macrium Reflect Free
Macrium Reflect Free is a powerful and versatile freeware imaging tool that allows you to create backups of your entire system or individual partitions. One of its most valuable features is the ability to create bootable rescue media, essential for system recovery in case of a hard drive failure or other catastrophic event. This allows you to boot your computer from the rescue media and then use Macrium Reflect to restore your system image, effectively bringing your computer back to a previous working state.
Creating this media is a straightforward process, and this guide will walk you through it.
Bootable Rescue Media Creation in Macrium Reflect Free
Creating bootable rescue media with Macrium Reflect Free involves selecting the desired media type (USB drive or CD/DVD), ensuring the media is properly formatted, and then letting Macrium Reflect do its magic. The process is fairly intuitive, but a few key steps ensure a successful creation. First, you’ll need to download and install Macrium Reflect Free. Then, launch the program and navigate to the “Create Rescue Media” option, usually found within the main menu.
You’ll be presented with choices for the type of media, and the software will guide you through formatting the chosen drive. It’s crucial to back up any data on the target drive before proceeding, as the formatting process will erase all existing data. Once the media is formatted, Macrium Reflect will create the bootable rescue environment. This typically takes a few minutes depending on the size of the media and your computer’s processing speed.
After the process is complete, you’ll have a bootable USB drive or CD/DVD containing the necessary tools to restore your system image if needed.
Bootable Media Types: USB Drive vs. CD/DVD
The choice between creating bootable rescue media on a USB drive or a CD/DVD depends on several factors. Both options serve the same fundamental purpose: providing a means to boot your computer and access Macrium Reflect’s recovery tools. However, they differ significantly in speed, reliability, and convenience.
The following comparison highlights the key differences between USB and CD/DVD bootable media:
- Speed: USB drives generally offer significantly faster boot times compared to CD/DVDs. This is due to the much faster data transfer rates of USB technology. Booting from a CD/DVD can take several minutes, while a USB drive often boots in seconds.
- Reliability: USB drives, while generally reliable, are susceptible to physical damage and data corruption. CD/DVDs, while less prone to physical damage, can suffer from scratches or data degradation over time. However, a well-maintained USB drive tends to offer better long-term reliability than a CD/DVD.
- Convenience: USB drives are far more convenient to carry and use. Their smaller size and portability make them a more practical choice for most users. CD/DVDs, while still functional, are bulky and require an optical drive to be used.
- Capacity: USB drives typically offer far greater storage capacity than CD/DVDs. This is particularly important if you want to include additional recovery tools or large system images on your rescue media.
Macrium Reflect Free
Macrium Reflect Free is a surprisingly powerful free tool for managing your hard drive partitions. While it lacks some of the advanced features of its paid counterpart, it’s perfectly capable of handling basic partition management tasks, making it a great option for users who need to occasionally create, delete, or resize partitions. However, it’s crucial to understand the risks involved before diving in.
Partition Management Basics
Working with partitions directly affects your data. Incorrectly resizing or deleting a partition can lead to data loss, system instability, or even a complete system failure. Always back up your important data before attempting any partition management tasks. Macrium Reflect Free, ironically, is an excellent tool to create these backupsbefore* you start messing with your partitions. Think of it as your safety net.
Creating a New Partition for Data Storage After Cloning
Let’s say you’ve cloned your system drive to a new, larger hard drive using Macrium Reflect Free. You now have extra unallocated space. Creating a new partition for your data keeps your operating system and data separate, improving organization and potentially simplifying recovery in case of problems.To create this new partition:
1. Open Macrium Reflect Free
Launch the application and select the disk with the unallocated space. This will usually be your new, larger hard drive.
2. Select “Partition Wizard”
Within the Macrium Reflect interface, you’ll find an option to launch the Partition Wizard. This is where the partition management magic happens.
3. Create a New Partition
The Partition Wizard will display your disk’s layout. Look for the unallocated space. Select it, and then choose the “Create Partition” option.
4. Specify Partition Parameters
You’ll need to specify the size of the new partition (in gigabytes or megabytes), the drive letter (e.g., D:), and the file system (usually NTFS for Windows). Consider the amount of data you plan to store to determine the appropriate size.
5. Apply Changes
Once you’ve configured the new partition to your liking, review your changes carefully. Then click “Apply” to commit the changes. This process may take some time, depending on the size of the partition and the speed of your hard drive.
6. Format the New Partition
After the partition is created, you’ll need to format it. This prepares it for data storage. You can do this through Windows File Explorer or a third-party disk management tool.Remember, the process is irreversible. Once you apply the changes, they are permanent. Always double-check your settings before clicking “Apply” to avoid potential data loss.
The consequences of an accidental deletion or misconfiguration can be significant. It’s always best to proceed with caution and have a recent backup readily available.
Macrium Reflect Free
Macrium Reflect Free offers a surprisingly robust set of backup options, going beyond just full system images. For users who only need to protect specific data, the ability to back up individual files and folders is a valuable feature, saving disk space and backup time compared to full system images. This section details how to leverage this functionality, schedule backups, and manage retention policies.
Backing up individual files and folders in Macrium Reflect Free is straightforward. Instead of creating a system image, you’ll create a file-based backup. This allows you to select precisely which files and folders you want to protect, providing granular control over your backup strategy. This is particularly useful for documents, projects, or other critical data that doesn’t require a full system restore.
Creating File and Folder Backups
To create a file and folder backup, launch Macrium Reflect Free. Instead of selecting “Create a backup image,” you’ll choose the option to create a “File and Folder Backup”. The interface will then prompt you to browse your system and select the specific files and folders you wish to include. You can use the standard Windows file explorer interface to navigate and make your selections.
Once you’ve chosen your target files and folders, you’ll select a destination for the backup, which can be an external drive, a network share, or even another location on your internal hard drive. Remember to choose a destination with sufficient space to accommodate the selected files and folders. After selecting the destination, you can choose a name for your backup, and then initiate the backup process.
Macrium Reflect will then compress and copy the selected files to your chosen destination.
Scheduling File and Folder Backups
Once a file and folder backup is created, scheduling regular backups is crucial. Macrium Reflect Free allows you to set up recurring backups, ensuring your data is protected on a consistent basis. After creating your initial backup, you can modify the backup settings and enable scheduling. You’ll be able to specify the frequency of backups (daily, weekly, monthly, etc.), the time of day for the backups to run, and any additional options like compression levels.
Setting up a schedule minimizes the risk of data loss due to unforeseen events. For example, a daily incremental backup would only copy files that have changed since the last backup, minimizing the time and space required for subsequent backups.
Retention Policies for File and Folder Backups
Managing the number of backup versions is critical for efficient storage management. Macrium Reflect Free allows you to define a retention policy. This policy dictates how many previous versions of your backups are kept. You can configure the software to keep only the most recent backup, or to retain multiple versions over a specified period. For instance, you might choose to keep the last seven daily backups, or the last four weekly backups.
Defining a retention policy prevents your backup storage from becoming overloaded with unnecessary older versions, while still providing sufficient recovery points in case of data loss. Carefully considering your data’s importance and your available storage space will help determine the optimal retention policy.
File/Folder Backup vs. Full System Image Backup: A Comparison
Choosing between backing up individual files and folders versus creating a full system image depends on your needs and priorities. Both methods offer valuable protection, but their strengths and weaknesses differ significantly.
| Feature | File/Folder Backup | Full System Image Backup |
|---|---|---|
| Backup Speed | Faster, as only selected data is backed up. | Slower, as the entire system is imaged. |
| Storage Space | Requires less storage space. | Requires significantly more storage space. |
| Recovery Time | Faster recovery of individual files and folders. | Longer recovery time, potentially requiring a full system restore. |
| Recovery Scope | Restores only selected files and folders. | Restores the entire system to a previous state. |
| Complexity | Simpler to manage and understand. | More complex to manage, requiring more technical knowledge. |
Macrium Reflect Free
Macrium Reflect Free, while primarily a graphical application, doesn’t offer a command-line interface (CLI) for directly controlling its backup and restore processes. Unlike some enterprise-level backup solutions, it relies entirely on its user-friendly graphical interface. This means all operations, from creating backups to scheduling tasks, must be performed through the program’s menus and dialog boxes. This approach prioritizes ease of use over scripting and automation for advanced users.
Absence of a Command-Line Interface
The lack of a command-line interface in Macrium Reflect Free limits its integration with automated scripting and system administration tools. Tasks that could be easily automated using a CLI in other backup software require manual intervention within the graphical interface of Macrium Reflect Free. This can be a significant drawback for users managing multiple systems or requiring highly automated backup routines.
For example, incorporating Macrium Reflect Free backups into a larger automated system deployment or server maintenance script would be impossible without resorting to third-party automation tools that interact with the GUI.
Alternative Automation Methods
While a direct CLI is absent, some level of automation can still be achieved using the built-in scheduling features within the Macrium Reflect Free graphical interface. Users can schedule backups to run at specific times or intervals. However, this scheduling is limited to the options provided within the application itself and lacks the flexibility and power of a true CLI.
For instance, one can schedule a daily backup at 2 AM, but complex conditional logic or dynamic target selection based on system status isn’t possible. To achieve more sophisticated automation, users might need to explore external task schedulers (like Windows Task Scheduler) to trigger the execution of the Macrium Reflect Free application at specified times.
Benefits and Drawbacks of the GUI-Only Approach
The reliance on a purely graphical interface presents both advantages and disadvantages. The benefit is undeniably its simplicity and ease of use for the average user. The intuitive interface makes it accessible to individuals with minimal technical expertise. However, the lack of a CLI severely restricts its use in automated, large-scale deployments or scenarios requiring complex scripting for tasks such as integrating with other systems or triggering backups based on specific events.
The absence of a CLI significantly impacts the scalability and flexibility of Macrium Reflect Free for advanced users and system administrators.
Macrium Reflect Free
Macrium Reflect Free is a powerful and popular disk imaging and cloning tool, offering many features for backing up your system. However, like most free software, it comes with certain limitations compared to its paid counterpart. Understanding these limitations is crucial before deciding if it’s the right backup solution for your needs. This section will delve into those restrictions and explore some viable free alternatives.
Limitations of Macrium Reflect Free Compared to the Paid Version
The free version of Macrium Reflect offers a robust set of features for basic system backups and restores. However, several key functionalities are reserved for the paid, Pro, or Corporate editions. These limitations primarily revolve around advanced features and support. For instance, Macrium Reflect Free lacks support for incremental backups, which can significantly reduce storage space usage over time compared to full image backups.
It also doesn’t include features like automated backups or scheduled cloning, meaning you’ll need to manually initiate these processes. Furthermore, technical support is limited in the free version; paid versions provide access to dedicated support channels for faster resolution of any issues. Finally, some advanced features like universal restore (the ability to restore an image to dissimilar hardware) are also exclusive to the paid versions.
Alternative Free Backup Software Options
Several free backup software options provide comparable functionality to Macrium Reflect Free, each with its own strengths and weaknesses. Choosing the right one depends on your specific needs and technical comfort level.
| Software | Key Features | Strengths | Weaknesses |
|---|---|---|---|
| EaseUS Todo Backup Free | System backup, disk/partition backup, file backup, clone, recovery | User-friendly interface, good performance, supports various backup types | Some advanced features are limited or absent |
| AOMEI Backupper Standard | System backup, disk/partition backup, file backup, clone, restore, incremental/differential backups | Wide range of features, including incremental backups, relatively easy to use | Can be slightly slower than other options for very large backups |
| Veeam Agent for Microsoft Windows Free | Image-based backups, cloud-based backup (limited capacity), file-level recovery | Good for cloud-based backups (with limitations), integrates well with Veeam’s enterprise solutions | Limited cloud storage for free version, interface may feel less intuitive than other options. |
Feature Comparison: Macrium Reflect Free vs. Alternatives
Comparing Macrium Reflect Free with EaseUS Todo Backup Free and AOMEI Backupper Standard highlights the differences in capabilities. Macrium Reflect Free excels in its straightforward image-based backup and restore process, making it easy to create full system backups. However, the lack of incremental backups and scheduling can be drawbacks. EaseUS Todo Backup Free offers a similar user experience but with more flexibility in backup types.
AOMEI Backupper Standard stands out by offering incremental and differential backups, significantly improving storage efficiency. The choice ultimately depends on prioritizing ease of use versus features like incremental backups and scheduling. While Macrium Reflect Free provides a reliable and simple solution for basic backups, alternatives like AOMEI Backupper Standard may be preferred for users who require more advanced features.
Closing Summary
Mastering Macrium Reflect Free empowers you to take control of your data security and system integrity. From straightforward backups to more advanced cloning and restoration techniques, this software provides a robust and accessible solution for protecting your valuable information. While it has limitations compared to its paid counterpart, Macrium Reflect Free offers a compelling set of features that make it an excellent choice for many users.
By understanding its strengths and limitations, you can effectively leverage this tool to safeguard your digital assets and ensure peace of mind.
FAQ Section
Can I use Macrium Reflect Free on a non-Windows system?
No, Macrium Reflect Free is only compatible with Windows operating systems.
How much hard drive space does Macrium Reflect Free need to install?
The installer itself is relatively small, but you’ll need significantly more space to store your backups, depending on the size of your system drive and chosen compression level.
What happens if my backup drive fails?
Having a second backup of your images on a separate external drive or cloud storage is highly recommended to prevent data loss.
Can I restore a system image to a smaller hard drive?
Potentially, but it depends on the size of the system image compared to the available space on the target drive. You might need to selectively restore only the necessary partitions.
Does Macrium Reflect Free support cloud backups?
No, direct cloud backups are not supported in the free version. You can, however, back up to a network share or external drive, then move that backup to cloud storage.